LogoLogo
  • Welcome
  • Getting Started
    • Quickstart Guide
    • Features
    • Board Overview/Connectors
    • How the System works
      • Firmware Menusystem
      • Motion Operation
      • Service Menu
      • Settings Menu
        • Filter Settings
        • Actuator Settings
        • System Settings
        • Rig Settings
      • Motion Submenu
      • Quick Access Options
    • Button Boxes & Handhelds
    • Setup your Motion Rig
      • Configuration Form
      • Rig
      • Actuators
        • Rotating Actuators
        • Linear Actuators
        • Belt Tensioner Actuators
        • Custom Actuators
        • Endless slew Actuators
      • Pulse Frequency
      • Filters
      • Setup
      • Service / Testing
      • Factory Resets
      • Firmware Updates
      • Direct Motion Mode
      • Position Motion Mode
      • Network
  • Wiring
    • Wiring Online Switch & Safety Stop
    • Wiring Position End Switch for Homing
    • Wiring a Servo Brake
  • Servo Driver Settings
    • Wiring Driver
    • AASD Monitoring Parameters
  • NEW! AASD Servo Torgue Mode for Belt Tensioner
  • FAQ and Troubleshooting
    • Troubleshooting Controller Boot Issues
  • Motion
    • How motion cueing works
    • Dashboard Motionsystem
    • Simtools
    • Flypt Mover
    • DR Sim Manager
    • SimHub
  • Information
    • Serial Commands
    • Communication and Electronics Gear Settings
    • Board Revisions
  • Youtube
  • Discord
  • Github
  • Instagram
  • Terms of Service
  • Privacy Police
Powered by GitBook
LogoLogo

Copyright © Motion4Sim LLC 2024

On this page

Servo Driver Settings

PreviousWiring a Servo BrakeNextWiring Driver

Last updated 2 months ago

AASD Servo Drivers these are the mostly used servo drivers used , manual for these drives you can find follow this link

Servo Amplifier Settings

The controller can be connected to any servo that has a DB25 connector. It's also possible to create custom adapter cables. Please inquire about compatibility.

AASD-15A Servo Settings:

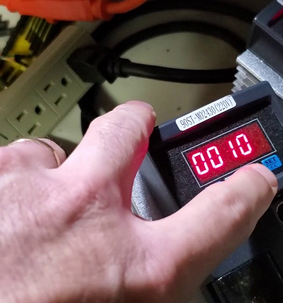
  1. Push the MOD button until you see Pn000. This enters the parameter mode.

  2. Change and verify these settings on all motors:

    • FN9 = 230 (230 Volts is recommended for this value). Check this value if you encounter errors. FN9 measures and stores the reference voltage.

    • Pn8 = 300

    • Pn9 = -300

    • Pn51 = 3000

    • Pn98 = 1-20 - Pulse Multiplier (electronics gear) different from Thanos and SFX for higher resolution. Typically on M4S, you can set this to PN98 = 2. From PCB version >1.09, the controller supports higher pulse frequencies, so it's possible to use PN98=1 with higher frequencies, allowing the motor to run at full speed.

    • Pn109 = 1 - smoothing, 1=fixed smoothing, 2=s-Shaped smoothing

    • Pn110 = 30 - Smoothing Filter Time

    • Pn113 = 20 - Feedforward %

    • Pn114 = 10 - Feedforward Filter Time (ms)

    • Pn115 = 100 - Gain %

    • Pn24 = 100

    • Pn51 = 3000 Motorspeed (2500 or 3000 mainly)

    • Pn52 = 1 Sigin Port 1 Servo enable

    • Pn60 = 2 Sigout Port 1 Servo ready

    • Pn61 = 6 Sigout Port 2 Servo Treach

    • Pn62 = 4 Sigout Port 3 Servo Preach

    • PN24 = 100 - This value indicates that you can reduce the torque for homing to better protect your actuators. You can set PN24 to 80%.

These settings ensure optimal performance and protection for your motion rig. Make sure to verify and adjust them as needed for your specific setup

AASD15A-Servo-Controller-for-Motion-Simrigs/user-guide/AASD-Manuals at master · motion4sim/AASD15A-Servo-Controller-for-Motion-SimrigsGitHub
Logo